4.2 The Process of Mapping: Step-by-step
When you are ready to begin, download the community asset mapping worksheet to use as you work through the lessons that follow.
Download the Community Asset Mapping worksheet
Step 1: Create Guiding Questions
When starting your community asset mapping initiative, you will want to have established an objective for the project objectives and use this objective to create a set of guiding research questions. For example, if you are seeking to expand the reach of your market into new neighborhoods and want to know what resources exist to supply healthy, fresh, and affordable food to the community, you might construct the following question-set:
- Where do residents go to buy healthy food in the community?
- How do residents access these healthy food options?
- When are these resources open?
- What kind of environment are the resources located in?
- What access barriers exist for the residents?
- What health food resources exist but are avoided (and why)?
These questions provide you with a starting point for your community engagement and will likely grow as you dive into your mapping project, but it’s important to keep your questions consistent and directly tied to your objective. This ensures you remain consistent and clear in your community engagement efforts.
Additional kind of question that you may wish to use is a “moonshot thinking” or “magic wand” type of question which presents community members with the opportunity to think beyond their current circumstances and imagine a desired state that may seem impossible. This type of question could be: “If you had a magic wand, what resources would your community have that would result in healthier lives for everyone?”
Step 2: Define the Scope of your Project
It’s important to define the scope of your work so that you can manage your team’s time and establish a list of community members to involve in the project. You can do this by:
-
Establishing your geographical boundaries: You can do this by any number of ways, such as by postal codes, neighborhoods, county lines, etc… Regardless of your approach, it’s important to establish your geographical boundaries at the beginning of your project because broadening the scope of your work later on will have time and resource implications for your mobile market.
-
Establishing your participant list: Community mapping should be participatory and you will want to involve community members from a broad range of groups and populations to ensure you have appropriate representation of perspectives. Keep in mind the “by the community, for the community” approach.
Step 3: Define the Work
It’s important to consider the types of data you will want to collect and how you will go about collecting it. When defining the work, you will need to have thought about the following:
1. Data Types: When thinking about the kinds of community assets you will be capturing to support your project objectives, you can think narrowly or broadly as you. A community asset can be anything that can be used to improve the quality of the community life. Here are some categories to consider:
- PEOPLE: These can be community members who use their abilities to improve the community. This could be a local celebrity, a leader of a community group. a respected elder, an artist, musician, community organizers, etc…
- PHYSICAL STRUCTURES: These could be schools, hospitals, churches, libraries, recreation centers, social clubs, etc…. This could be a town landmark or symbol or perhaps unused building that has the potential to house a community kitchen or hospice. You could also include public places that already belong to the community, such as green spaces, wetlands, etc…
- COMMUNITY SERVICES: These could be public transportation hubs or stops, early childhood education centers, community recycling facilities, cultural organizations, etc…
- ASSOCIATIONS & BUSINESSES: These could be any registered entity that provides support and jobs for the local economy.
- EVENTS: Regular events that define the community could also be considered community assets. These could be captured if they have established locations even if they aren’t permanent fixtures.
2. Data Attributes: What kinds of information will you need to collect for each asset? Consider the following:
- Name
- Description
- Mailing Address
- GPS coordinates
- Hours of Operation
- Main contacts
- Media (photos, videos, audio, documents)
- Reviews
- Accessibility
- Payment Types
3. Collection Methods
How will you collect this information? There are a variety of methods to use. Face-to-face discussion/interviews will create a higher degree of trust and enable you to get more detailed information from community members. The Field Guide to Human-Centered Design provides some helpful guidance on conducting interviews of various sizes. The Field Guide is in fact a fantastic resource to support a variety of community engagement and data collection methods, including observation and immersion. It is well worth spending some time to identify tools that you may want to use to support your community asset mapping.
Surveys are another method that can be used to gather data. You can survey your existing customer at your point of sale, asking them specific research questions or their willingness to participate in a community discussion/receive a survey. When doing so, make sure you capture your customers’ preferred method of contact and, to incentivize participation, offer a suitable benefit for providing their contact information such as a “chance to win” something from the market.
4. Secondary Resources: As you have probably noticed by now, the focus has been on primary sources for data collection — that is, directly from community members. This is by design. Direct engagement with your community members provides the most authentic view into their lives and offers you a variety of opportunities to not only gain direct knowledge of the complex nature of the community, but to develop empathy and deep connections. This being said, secondary research is sometimes a great complement to your dataset.
Secondary resources include research papers, reports, articles etc… can provide additional information or analysis that may prove useful to your mapping work. If using secondary resources, we recommend you use them to complement or enhance your community engagement and not to replace it. Additionally, ensure you are careful to ensure the source of your information is current, relevant, authoritative, accurate, and free of bias/alternate agendas.
Step 4: Create a Schedule
Once you have defined the work involved, it’s time to create a schedule. This involves two main considerations:
-
Who will do what (roles and responsibilities): For each team member, specific their project roles and the tasks they are responsible for.
-
When will they do it (timeline): You’ll want to create your timeline with the people who will be doing the work. Get some estimations from your team on their tasks and then identify any dependencies. Once you have a general timeline for the project work, identify some milestones that will help you identify the important checkpoints throughout the project. These will help you keep the project on track and provide you with some short-term goals to strive towards which tends to be more motivating for your team.
Step 5: Assess your Plan
Once you’ve created your plan, it’s important to assess the scope and time of what you intend to do. You may find the project once planned out in detail is the wrong size for the time and resources you have available or maybe it isn’t quite as extensive as it needs to be. That’s okay, this is the time to make some adjustments to steps 1-4 — to scale things back or up as needed.
Step 6: Communicate & Engage with the Community
With your plan in place, it’s time to move things forward. Reach out to the community members you identified using the methods you choose. If you are gathering in-person, choose a community hub such as a library or community center that is considered safe and accessible. If you are gathering virtually, the following toolkit can provide some guidance: Virtual Tool Kit
We encourage you to think about engagement creatively. Mapping can be, but it doesn’t have to be an interview-based process. You can use creative approaches to collect information and make the process fun for your community members. Imagine a community group gathered around a large table, working with a map of their local neighborhood spread out on the table. The group can use stickers, sticky notes, blocks, lego pieces, etc… to identify the resources that exist and ones that are needed in certain areas. It’s important to empower your community by giving them ways to become the co-creators of their community asset map.
Some ideas that have worked well to promote this type of collaborative design are…
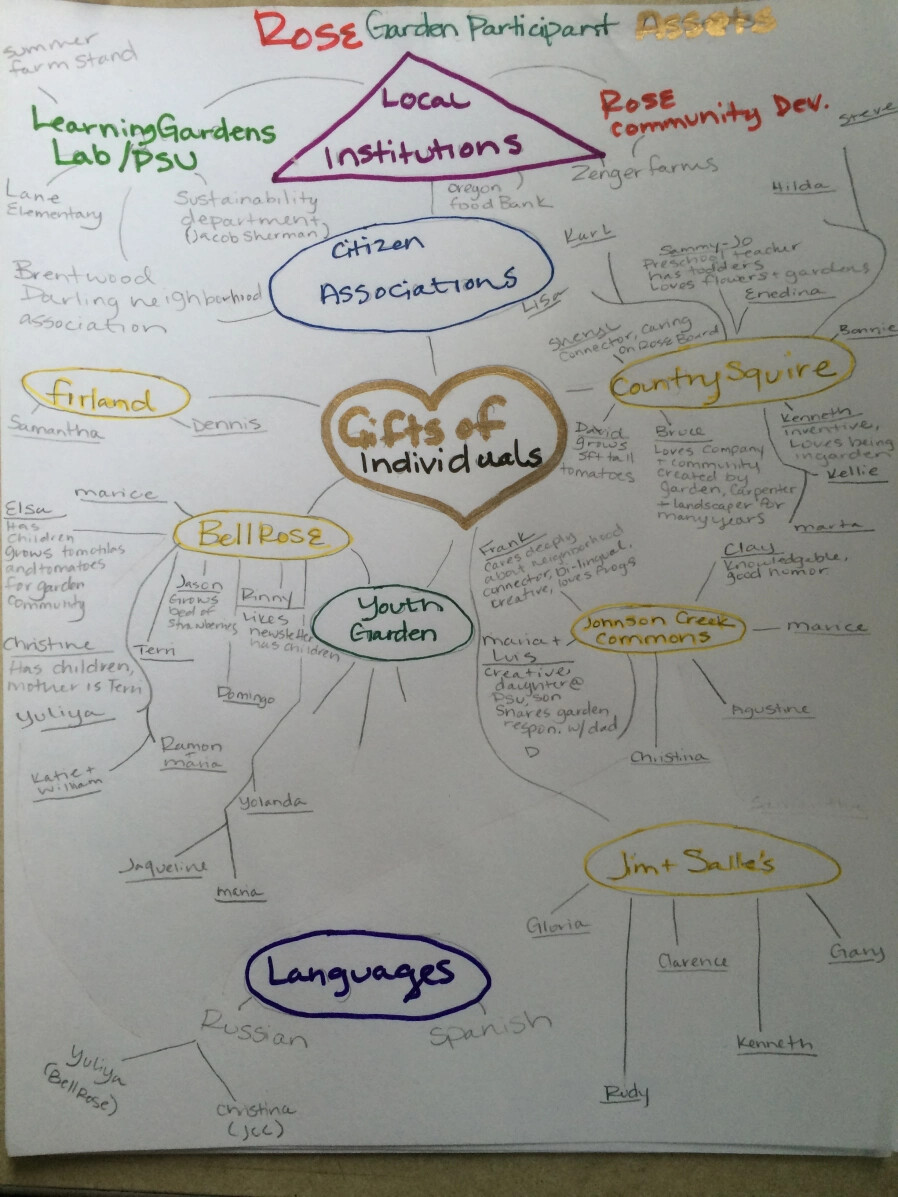
Mind Mapping
Create mind map style drawing to help identity asset categories and then assets. This can easily be done on a whiteboard or blackboard.
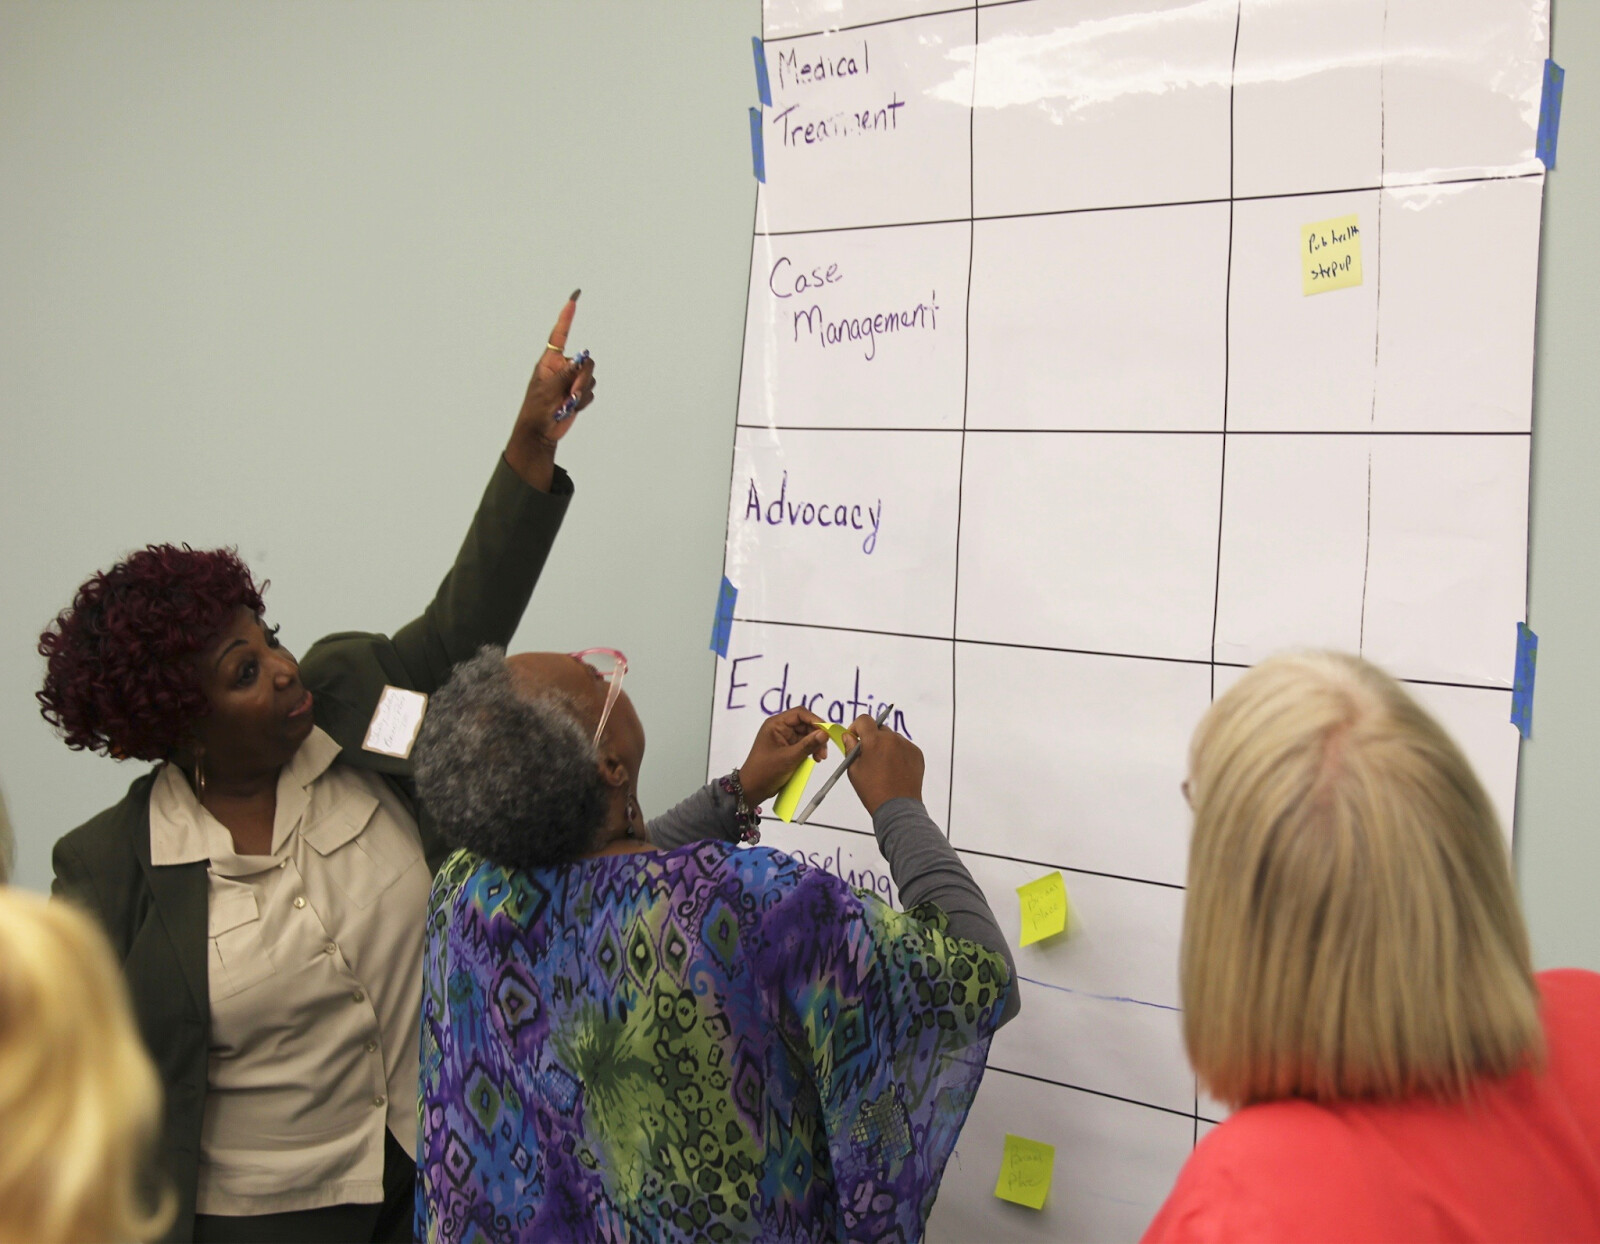
Sticky Notes
If you don’t have a drawing board available, you can build a map using sticky notes on a wall.
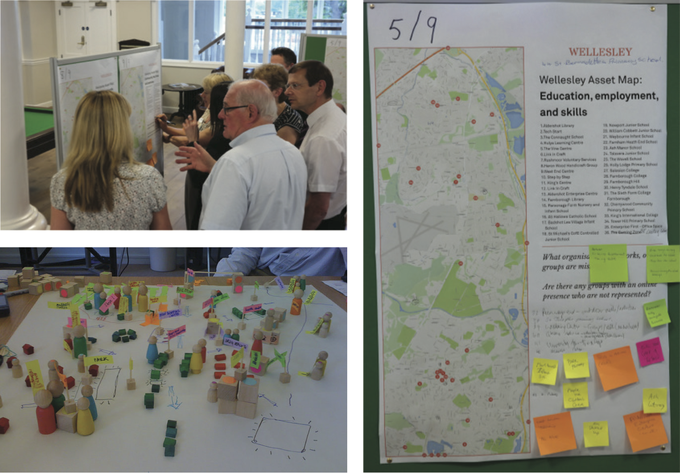
Tabletop Map
If you have a big printed map of the community, use it in your session to engage your community members. You can use a variety of objects such as lego, colored dot stickers, even multi-colored candies such as skittles to represent community resources.
These interactive sessions can be very empowering, often resulting in opportunities for community members to open up, share stories, find common ground, and develop deep understanding with one another.
As the facilitator of this unique experience, you and your team will gain direct insights into your community’s challenges and needs, but this work can sometimes result in an overwhelming amount of information. To wade through the information, it will help to focus community members not just on gaps that have been identified, but also what the priority is for the community.
A final tip to ensure you get the most out of these sessions is to be mindful of capturing your completed maps before items begin to move or disappear. This is certainly a risk if you are using candy to denote your community assets!
Taking some photographs of your maps will often suffice.
Step 7: Creating the Map
Once you have your data collected, you’ll need to create your map. Digital maps are a wonderful way to present your information and are by far the easiest to maintain, share, and interact with. Don’t worry, you don’t need to be a technical wizard in order to create a complex and engaging map. There are several mapping software options available to you, but Google My Maps is probably the easiest and fit-to-purpose tool for the job. Most of us are familiar with Google Maps for navigating help and planning. As part of their mapping platform, Google also offers free and personalized mapping capability, allowing you to build, save, and share your very own maps. Called “My Maps” (Google Maps), this feature allows you to create maps of any place in the world, adding routes, color-coding, text, photos, or video. Google’s search functionality works on top of your custom map, so you can add local businesses and notable locations to your map by searching near a location. We recommend using this tool to create your community assets map. The following tutorial will help you get started.
https://youtu.be/6elLS2btYAs?si=lt2ULVVRFRDJLKho
When building your mapping, make sure you make use of color-coding to differentiate between types of assets, but also consider other attributes to highlight using color, such as quality of asset:
- Exists and meets the needs of the community (green)
- Needs improvement (yellow)
- Non-existent, but needed (red)
Most of us have a pretty good understanding of what kinds of information we’ll find on a typical map. Creating your own map provides you with an opportunity to think outside of the conventions of a traditional map. Consider using more descriptive attributes in your map, such as status, condition, behavior, knowledge, or skills that a person, group, structure, or place possesses. You could also enhance descriptions with attributes presented in formats other than text, such as videos, images, or web links to provide additional links, community perspectives, and complementary resources.
Step 8: Sharing & Maintaining the Map
Once you have created your map, sharing it is relatively easy using the Google sharing features. You can also embed your map on your website and use your map as a promotional tool. Viewers of your map will also be able to embed or share your map via email or via social media. Your map will provide a visual representation of your community’s knowledge but it is important to note that this knowledge will change over time so you should consider how and when you plan to maintain your map. The frequency of this will be based on the original objective of your mapping initiative, but you will likely find engaging your community to iterate upon your existing map an easier process.
Reflection: Now that you’ve worked through the steps of engaging with your community and creating an asset map, we’d love to hear about your experiences. Share your map here and tell us how you approached mapping your community.
What challenges did you encounter? What stories did you hear? How did the process and tools work for you and your team? Are there any tools and/or strategies you would recommend?